
Short direct answer
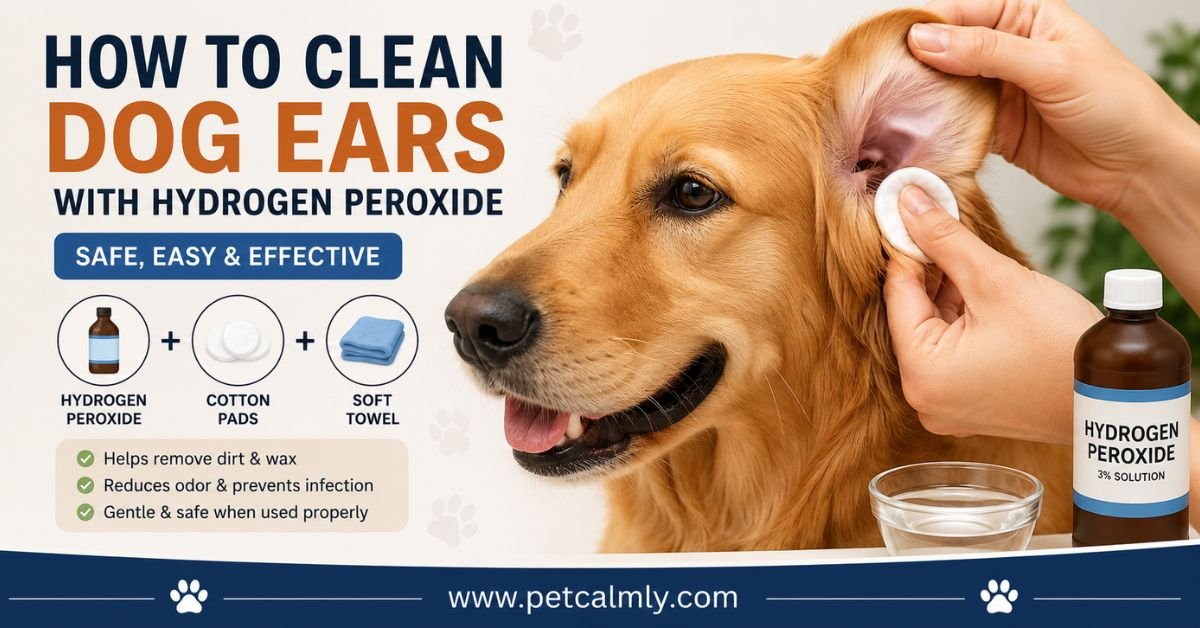
You can safely clean your dog’s ears with hydrogen peroxide when diluted correctly (50/50 mix with water), applied gently with a dropper, and massaged into the ear canal for 5 minutes before allowing your dog to shake it out. Always use 3% hydrogen peroxide, never higher concentrations, and stop immediately if your dog shows signs of pain or if you suspect a ruptured eardrum. When in doubt, consult your veterinarian before starting any ear cleaning routine.
Introduction
If you’ve noticed your dog shaking their head more than usual or scratching at their ears, you’re not alone. Ear problems are one of the most common reasons pet owners visit the vet, and they’re also one of the most preventable. The good news? Regular ear cleaning at home can make a real difference in your dog’s comfort and long-term ear health.
Hydrogen peroxide has been used for decades to clean dog ears, and when used correctly, it’s an affordable and effective option. But there’s a right way and a wrong way to do it—and the difference between these approaches can mean the difference between healthy ears and a trip to the emergency vet.
This guide walks you through everything you need to know: how to actually do it, why it works, when to skip it entirely, and most importantly, when your dog needs professional help instead. I’ve included real situations you might encounter and practical tips from years of pet-care experience.
Why Dogs Need Ear Cleaning
The Hidden World Inside Your Dog’s Ears
Your dog’s ears are nothing like human ears. Where we have simple ear canals, dogs have long, L-shaped ear structures that create the perfect environment for moisture, debris, and infection to build up. Add floppy ears (which trap even more warmth and moisture) and a dog’s natural tendency to swim or play outside, and you’ve got a recipe for ear trouble.
Dogs can’t clean their own ears the way we do. They can’t reach inside, and they can’t dry out the deep parts of the canal. This is why some dogs—especially those with droopy ears like Cocker Spaniels, Basset Hounds, and Poodles—are so prone to ear problems.
When Buildup Becomes a Problem
The ear canal naturally produces wax and oils. This isn’t dirty or wrong it’s protective. But when combined with water, dead skin cells, yeast, or bacteria, this buildup creates an environment where infections thrive. Regular cleaning removes the excess while leaving behind enough protective coating.
That’s where hydrogen peroxide comes in. It gently breaks down waxy buildup and has natural antimicrobial properties without being harsh on delicate ear tissue.
Is Hydrogen Peroxide Safe for Dog Ears?
The Short Answer (And Why the Details Matter)
Yes, hydrogen peroxide is generally safe for dog ears when used at the right concentration and applied correctly. But “safe” depends entirely on how you use it.
The problem is that many pet owners make dangerous mistakes: using full-strength hydrogen peroxide, using it too frequently, or continuing even after signs of damage appear. These mistakes can actually damage the very ears you’re trying to help.
Why 3% Hydrogen Peroxide Is the Right Choice
Veterinarians recommend 3% hydrogen peroxide for dog ears—this is the standard drugstore version. Higher concentrations (like 6%, 9%, or 35%) can burn delicate ear tissue and should never go inside your dog’s ears. Even 3% must be diluted to avoid irritation.
Here’s what happens at the cellular level: hydrogen peroxide breaks down into water and oxygen gas. That oxygen helps lift debris and wax out of the ear canal. The fizzing sensation—which is that oxygen release—is what makes it effective. But this same process can damage tissue if the solution is too strong.
When NOT to Use Hydrogen Peroxide
Stop using hydrogen peroxide and contact your vet immediately if:
- Your dog’s eardrum is ruptured or perforated
- There’s discharge that looks like pus or blood
- Your dog shows extreme pain or sensitivity
- Your dog has been recently treated for an ear infection
- You notice redness or swelling that worsens after cleaning
The reason? If the eardrum is damaged, hydrogen peroxide can enter the middle ear and cause serious complications. This is why any dog with acute pain or signs of infection needs a vet check before home treatment.
What You Need Before You Start
Gather the Right Supplies
You don’t need much, but having everything ready makes the process smoother and less stressful for both you and your dog:
- 3% hydrogen peroxide (the standard brown bottle from any pharmacy)
- Distilled water (tap water can contain chlorine or minerals that irritate ears)
- A dropper or small bottle (many pet stores sell ear wash bottles, but a clean dropper works fine)
- Soft cotton balls or gauze (not cotton swabs—more on this later)
- A towel (your dog will shake vigorously, and it will go everywhere)
- Treats (to reward your dog for cooperation)
- A second person is helpful (one to hold your dog gently, one to apply solution)
The Right Dilution Ratio
Mix hydrogen peroxide and distilled water in a 50/50 ratio. This means:
- 2 parts 3% hydrogen peroxide
- 2 parts distilled water
Example: Mix 2 tablespoons of hydrogen peroxide with 2 tablespoons of distilled water in a clean, labeled bottle. Shake gently before each use. Label this clearly so no one accidentally uses it for wounds or other purposes.
This diluted solution should feel warm (like lukewarm bathwater) when you apply it. Never use cold solution—it’s uncomfortable and can cause vertigo or dizziness in your dog.
Pre-Cleaning Checklist
Before you start, ask yourself:
- Does my dog have any visible discharge or blood in the ear? (If yes, see a vet)
- Is my dog showing signs of extreme pain when I touch the ear? (If yes, see a vet)
- Has my dog recently had ear medication or treatment? (If yes, wait until fully healed)
- Is my dog fever-free and acting normally? (Fever might indicate infection)
Step-by-Step Guide to Cleaning Dog Ears With Hydrogen Peroxide
Before You Begin: Set the Right Mood
Your dog picks up on your energy. If you’re tense, your dog will be tense. Create a calm environment:
- Choose a time when your dog is naturally relaxed (not right after excited play)
- Have your supplies gathered and organized
- Some people put a towel or mat down to contain the mess
- Speak in a calm, reassuring voice throughout
Step 1: Inspect the Ears
Before applying anything, look inside both ears:
- What color is the ear tissue? (Normal is pink)
- Is there visible debris or wax buildup?
- Does it smell normal (slightly waxy) or does it have an odor?
- Are there any scabs, redness, or discharge?
If you notice anything concerning unusual odor, visible redness, scabs, or discharge—contact your vet before proceeding.
Step 2: Prepare Your Dog
Have your dog sit or lie down on the towel, ideally with their head accessible. If you have a helper, have them gently hold your dog steady. This isn’t about physical restraint it’s about keeping your dog oriented so the solution doesn’t run down their face or into their eyes.
Step 3: Fill the Ear Canal
Using your dropper, slowly fill one ear canal with the diluted hydrogen peroxide solution. How much? Enough to fill the canal and create a slight pooling at the opening. For most dogs, this is about ½ to 1 dropper full, but you’ll learn what’s right for your dog’s ear size with practice.
Work slowly. Rushing this step can startle your dog or cause discomfort.
Step 4: Massage Gently
This is the most important step, and it’s where most people rush. Once the solution is in the ear:
- Use your thumb and fingers to gently massage the outer part of the ear
- Work the solution deeper into the canal by massaging the cartilage at the base of the ear
- You’ll hear (and feel) a squelching sound—this is normal and means the solution is working
- Continue massaging for 3-5 minutes
This extended massage is what allows the hydrogen peroxide to break down wax and debris. Rushing this part means the solution just drains out without doing its job.
Step 5: Let Your Dog Shake
After massaging, your dog will want to shake their head. Let them! Step back and let them shake the excess solution and loosened debris out onto the towel. This is both therapeutic for them and necessary for the process to work.
This shake is a powerful part of the cleaning it’s how the debris gets expelled. Some dog owners say the shake-off is their dog’s favorite part.
Step 6: Clean Up the Excess
After your dog finishes shaking, use soft cotton balls or gauze to gently wipe away excess solution and any visible debris from the outer ear and ear flap. Be gentle and don’t force anything deeper into the canal. You’re just removing what’s come out.
Step 7: Repeat on the Other Ear
Follow the same process for the second ear. Some dogs will be more cooperative the second time once they understand the routine.
Step 8: Reward Your Dog
Offer treats and praise. Your dog just cooperated with something unfamiliar that’s worth recognizing. This positive reinforcement makes future cleanings easier.
How Often Should You Clean Your Dog’s Ears?
There’s no one-size-fits-all answer, and this is where individual dog needs vary significantly.
Dogs that rarely need cleaning:
- Short-haired breeds with erect ears
- Dogs with dry, healthy ear canals
- Dogs that don’t swim or get dirty frequently
These dogs might only need cleaning every 4-6 weeks, or even less frequently.
Dogs that need regular cleaning (weekly or every 2 weeks):
- Breeds with floppy or folded ears
- Dogs prone to ear infections
- Dogs that swim frequently
- Dogs with allergies or sensitive skin
- Dogs with excess ear wax production
The rule of thumb: If your dog’s ears start to smell musty or look waxy again, it’s time to clean. Don’t clean on a rigid schedule—clean when your dog actually needs it.
Over-cleaning can disrupt the ear’s natural protective balance, so more frequent isn’t always better.
7 Common Mistakes That Can Hurt Your Dog’s Ears
1: Using Cotton Swabs (Q-Tips)
This is the most dangerous mistake. Cotton swabs can:
- Push wax and debris deeper into the canal instead of removing it
- Puncture the delicate eardrum
- Get stuck in the ear canal
- Cause your dog to jerk suddenly and damage their own ear
Use cotton balls or gauze instead. These are soft and won’t penetrate deeply into the canal.
2: Using Full-Strength Hydrogen Peroxide
Your instinct might be that stronger solutions work faster. They don’t. Full-strength hydrogen peroxide burns delicate ear tissue and can cause chemical damage that’s worse than the original problem.
Stick to the 50/50 dilution. That’s the sweet spot between effectiveness and safety.
3: Ignoring Signs of Pain or Discomfort
If your dog yelps, tries to move away, or shows other signs of pain, stop immediately. Pain is your dog’s way of communicating that something’s wrong. Continuing anyway risks serious injury.
4: Cleaning Infected Ears Without Professional Help
If your dog has an active ear infection (characterized by discharge, strong odor, or visible inflammation), home cleaning can spread the infection or prevent medication from working properly. These ears need veterinary attention first.
5: Using Tap Water Instead of Distilled Water
Tap water can contain chlorine and other minerals that irritate ear tissue. Always use distilled water for dilution. It’s inexpensive and worth the peace of mind.
6: Not Warming the Solution
Cold solution going into the ear canal is uncomfortable and can cause dizziness. Warm it slightly by holding the bottle in warm water before use. Test the temperature on your inner wrist—it should feel like comfortable bathwater.
7: Cleaning Too Frequently
Weekly cleanings can be appropriate for some dogs, but daily cleaning disrupts the ear’s natural protective balance and can actually cause problems. Listen to your dog’s ears, not a calendar.
Signs Your Dog Needs Professional Ear Care
Knowing when to skip home cleaning and see your vet is just as important as knowing how to clean your dog’s ears yourself.
Schedule a Vet Appointment If You Notice:
Discharge or odor:
- Any pus-like, bloody, or thick discharge
- A strong, musty, or yeasty smell (not just regular ear wax smell)
- Black, brown, or waxy discharge that doesn’t improve with regular cleaning
Pain or sensitivity:
- Your dog yelps or pulls away when you touch the ear
- Extreme head shaking or scratching
- Your dog won’t let you look in the ear
- Visible swelling or redness inside the ear
Changes in behavior:
- Tilting their head to one side persistently
- Loss of balance or vertigo
- Behavior changes related to ears (suddenly head-shy, refusing ear touches)
Visual changes:
- Scabs or wounds inside the ear
- Swelling or heat radiating from the ear
- Thickened or crumbly skin inside the ear canal
- Pus or debris that doesn’t respond to cleaning
After Recent Treatment:
- If your dog recently finished ear medication or treatment, wait until the vet gives clearance before resuming home cleaning
- If symptoms return shortly after treatment ended, this suggests the infection wasn’t fully resolved
Why Professional Care Is Sometimes Necessary
Veterinarians have tools and expertise you don’t. They can:
- Examine the eardrum with an otoscope to check for rupture
- Identify the specific cause of ear problems (bacteria, yeast, mites, allergies, foreign objects)
- Prescribe targeted medication when needed
- Rule out systemic conditions (like allergies) that cause recurring ear issues
Some ear problems won’t resolve with cleaning alone they need medication. Trying to clean your way through an infection wastes time and can make things worse.
Prevention: Keep Your Dog’s Ears Healthy Year-Round
Preventing ear problems is easier than treating them. These habits can significantly reduce how often your dog needs cleaning or develops infections.
After Swimming or Baths
This is the single most important prevention step. Water trapped in the ear canal creates the perfect environment for infection. After your dog swims or gets a bath:
- Dry the outer ear thoroughly with a towel
- Gently use a cotton ball to absorb moisture from the ear opening
- Consider using a drying solution (your vet can recommend one) for dogs that swim frequently
Some preventative ear solutions are designed to dry and protect after water exposure—these can be game-changers for water-loving dogs.
Manage Allergies and Skin Issues
Many ear infections stem from underlying allergies. If your dog has:
- Seasonal itching
- Paw licking
- Skin irritation
- Recurring ear problems
Talk to your vet about whether allergies might be the root cause. Treating the underlying allergy often eliminates recurring ear infections without constant cleaning.
Keep Ear Hair Trimmed (When Appropriate)
Some dogs naturally have hair in their ear canals that traps debris. If your groomer or vet mentions this, regular plucking or clipping can help—but this should only be done if:
- Your dog’s ears are healthy
- Hair removal is necessary for your dog’s breed or specific situation
Not all dogs need this, and some find it uncomfortable. Let professionals guide this decision.
Regular Inspection
Make ear checks part of your routine:
- Look at your dog’s ears weekly
- Know what “normal” looks like for your dog
- Notice changes early
This takes 30 seconds and catches problems before they become serious.
Use Preventative Ear Treatments When Recommended
Some dogs benefit from monthly preventative ear solutions during high-risk seasons or if they have a history of infections. Ask your vet if this might help your dog.
More Information About Pets, Please Visit Our Website: How to Clean Dog Ears
Frequently Asked Questions
1: Can I Use Hydrogen Peroxide on a Dog With an Ear Infection?
Not without professional guidance first. If there’s discharge, strong odor, or visible inflammation, your dog has an infection that needs veterinary evaluation. Using hydrogen peroxide on an infected ear might:
- Spread the infection
- Prevent medication from working properly
- Cause pain if the eardrum is ruptured (you won’t know unless a vet checks)
Let your vet examine the ear first, provide appropriate medication, and then give you clearance for home cleaning. Usually this means waiting until the infection has cleared.
2: How Often Should I Clean My Dog’s Ears?
It depends on your dog’s individual needs. Most healthy dogs need cleaning every 2-4 weeks, but some need weekly cleaning and others rarely need it. Factors that determine frequency include:
- Breed (floppy ears need more frequent cleaning)
- Swimming habits
- Allergy history
- Natural wax production
- Overall ear health
Clean when your dog needs it, not on a rigid schedule. Overworking your way into ear problems is as real as neglecting them.
3: Is There an Alternative to Hydrogen Peroxide?
Yes, and your vet might recommend alternatives depending on your dog’s situation:
- Commercial ear cleaning solutions (many are specifically formulated for dogs)
- Saline solutions
- Vinegar and water solutions (usually 50/50)
- Drying solutions for water-exposed ears
Some dogs respond better to different solutions. If hydrogen peroxide seems to irritate your dog’s ears, ask your vet about alternatives. Different doesn’t mean better—it means different, so the choice depends on your dog’s specific ears.
4: What Do I Do if My Dog Has a Ruptured Eardrum?
This is a serious situation that requires veterinary care. If you suspect a ruptured eardrum:
- Stop all home cleaning immediately
- Don’t put any solution in the ear
- Contact your vet without delay
- Describe what made you suspect rupture (extreme pain, discharge, vertigo symptoms)
A ruptured eardrum needs professional treatment and monitoring. Home cleaning can cause serious complications.
5: Can Puppies and Senior Dogs Use Hydrogen Peroxide for Ear Cleaning?
Yes, both puppies and senior dogs can use diluted hydrogen peroxide if their ears are healthy. However:
- Puppies might be more sensitive to the sensation initially—take extra time and patience
- Senior dogs with chronic ear problems or other health conditions should get vet clearance first
- Older dogs with balance issues might be more bothered by the ear fullness during cleaning
The solution is the same (50/50 dilution), but go even more slowly with dogs experiencing any sensitivity.
6: What’s the Difference Between Hydrogen Peroxide and Commercial Dog Ear Cleaners?
Commercial ear cleaners are formulated specifically for dogs and often include additional beneficial ingredients. They might be:
- Less likely to irritate sensitive ears
- Formulated to address specific issues (drying, antimicrobial, antifungal)
- More pleasant-smelling
- Easier to apply
Hydrogen peroxide is a tried-and-true, inexpensive option. Commercial cleaners might be better for sensitive ears or specific conditions. If hydrogen peroxide isn’t working well for your dog, ask your vet about switching.
Can I Use Witch Hazel or Vinegar Solutions Instead?
Some pet owners use diluted witch hazel or vinegar solutions, and these can be effective for maintenance cleaning. However:
- These haven’t been as extensively studied in dogs as hydrogen peroxide
- Vinegar solutions can irritate already-inflamed ears
- Witch hazel can be drying if overused
These might work well for your dog, but start with small amounts and monitor for irritation. If your dog’s ears become red or irritated, switch back to hydrogen peroxide or consult your vet.
When to Call Your Vet Instead of Cleaning at Home
Trust your instincts. Your dog’s ear health matters, and professional expertise sometimes saves time and money:
Immediate Vet Visit:
- Your dog is in obvious pain
- There’s discharge that looks infected
- Your dog can’t balance or keeps tilting their head
- You suspect something is stuck in the ear
Within a Few Days:
- Your dog has a strong, unusual ear odor
- Redness or swelling is getting worse despite cleaning
- Your dog is scratching excessively
- You’re unsure whether your dog’s ears need cleaning or treatment
Preventive Check:
- Your dog has never had their ears examined by a vet
- Your dog has a history of recurring infections
- You’re starting ear cleaning for the first time and want professional guidance
Vets appreciate questions. They’d rather you be cautious than accidentally cause harm by guessing.
Conclusion
Cleaning your dog’s ears with hydrogen peroxide is a practical, cost-effective way to maintain ear health and catch problems early. When done correctly with the right dilution, gentle technique, and awareness of when professional help is needed—it’s a safe addition to your dog’s grooming routine.
The key is knowing your individual dog’s ears, understanding the difference between maintenance cleaning and treating infection, and being willing to step back and get professional help when something doesn’t feel right.
Your dog depends on you to keep them comfortable and healthy. Healthy ears mean fewer infections, less scratching, and a happier dog. That’s worth the few minutes it takes to clean them properly.
Start slowly, stay calm, reward your dog, and trust that you’re doing something genuinely helpful. Your dog’s ears will thank you.