Short direct answer
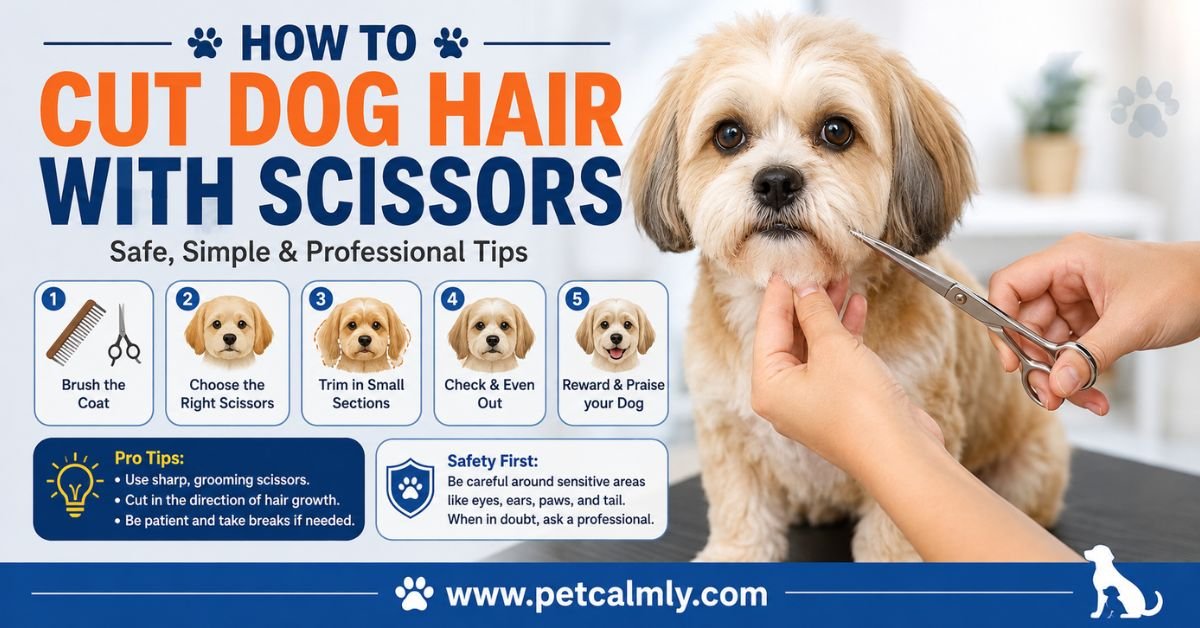
Yes, you can cut your dog’s hair with scissors at home, but it works best for maintenance trims on dogs with longer coats rather than complete transformations. Most dog owners successfully use grooming scissors for tidying up areas like face fringe, paw pads, and tail feathering between professional appointments. The key is understanding your dog’s coat type, having the right tools, and knowing which breeds and cuts suit DIY grooming. With patience and proper technique, home scissor grooming can save money and keep your dog looking neat while building confidence in basic pet care.
When Home Scissors Grooming Actually Works
Not every dog or every grooming situation calls for DIY scissors work. Before you buy your first pair of grooming shears, it helps to know what’s genuinely possible and what you’d better leave to professionals.
Dogs with longer, flowing coats—like Golden Retrievers, Cavaliers, and Doodles—respond well to maintenance trimming with scissors. These coats naturally lend themselves to scissor work because you can see what you’re doing and create clean lines without special equipment.
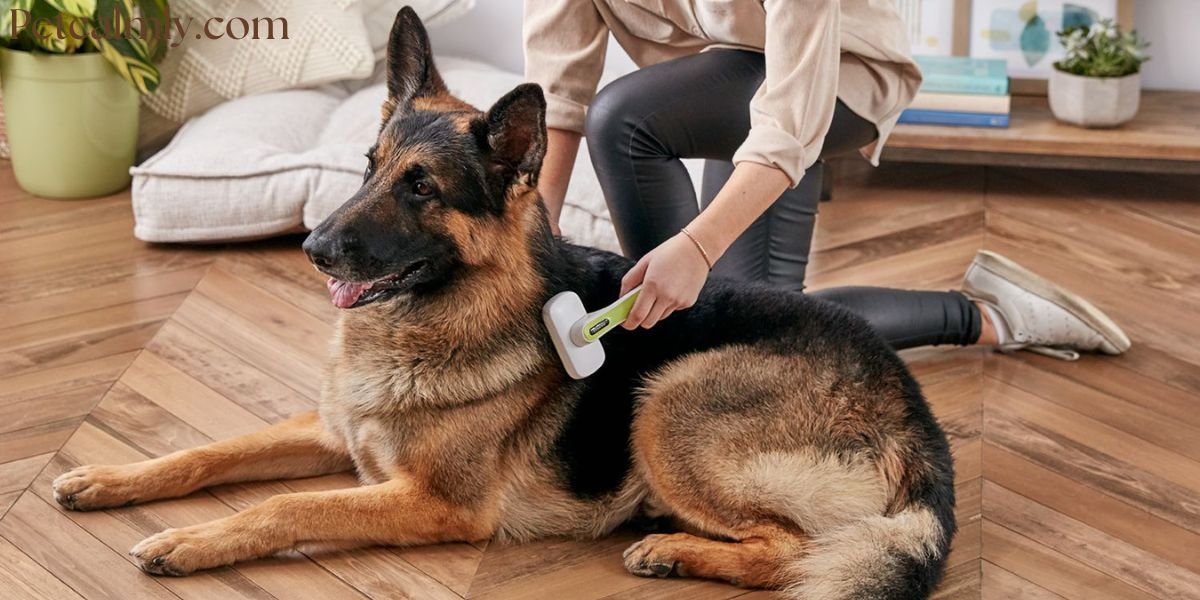
Double-coated breeds that need regular maintenance, like German Shepherds or Huskies, can be trimmed carefully, though you should avoid cutting through the undercoat.
Curly or wavy coats particularly in Poodle mixes can be maintained with scissors, though many owners eventually invest in clippers for easier maintenance.
Single-coated short-haired breeds like Beagles or Boxers rarely need scissor work at all. A simple bath and brush is usually enough.
The breeds that generally aren’t good candidates for home scissor grooming include show dogs requiring precise hand-stripping or specialized cuts, breeds with extremely thick double coats (unless you have serious experience), and dogs with matted coats that need professional dematting first.
The honest truth: scissor grooming works beautifully for maintenance and touch-ups, but it’s rarely the right approach for complete makeovers or breed-standard cuts. If your dog comes to you matted, overgrown, or needing a specific breed cut, a professional groomer is genuinely your best option not just for appearance, but for your dog’s comfort and skin health.
Why Your Dog Actually Needs Their Hair Trimmed (Beyond Looking Cute)
Before we get into the how, let’s talk about the why. Understanding your dog’s grooming needs helps you approach scissors work with the right mindset it’s not just vanity; it’s part of responsible pet care.
Overgrown hair causes genuine discomfort. Long hair around paw pads collects moisture, dirt, and bacteria, creating conditions where yeast and fungal infections thrive. Hair around the eyes can irritate and scratch the cornea. Matted hair pulls on the skin and can hide wounds or skin conditions. Some dogs develop behavioral issues anxiety, irritability, reluctance to be touched simply because matted or overgrown coat creates physical discomfort.
Temperature regulation matters. While a dog’s coat insulates against cold, excessive hair growth can trap heat and moisture, making dogs uncomfortable in warm weather and increasing the risk of heatstroke, especially in older dogs or those with health conditions.
Hygiene becomes easier. Dogs with trimmed hair around rear end areas can maintain better hygiene and are less prone to urinary tract and anal gland issues.
You spot problems faster. A well-groomed dog shows you skin conditions, lumps, or parasites you might otherwise miss under mats and overgrown hair. This is one of the most practical benefits of regular grooming early detection of health issues.
Most veterinarians recommend that all dogs, regardless of coat type, have some level of regular grooming. For maintenance-type grooming between professional visits, home scissors work is a practical, budget-friendly option when done correctly.
Essential Scissors and Tools for Dog Hair Grooming
You cannot use your kitchen scissors. Period. Regular scissors damage coat, dull quickly, and often don’t cut cleanly they’ll leave frayed edges and potentially yank on hair, causing pain and stress for your dog.
Professional grooming scissors are specifically designed for coat work and come in several types:
Straight scissors are your workhorse for general trimming. They’re easier to control for beginners and good for cutting longer lengths. Look for 7-8 inch professional-grade shears (brands like Andis, Oster, and Wahl are reliable and affordable). Expect to spend $25-50 for decent quality.
Curved scissors follow the contours of the body and create more blended, natural-looking results. They’re especially helpful for body sculpting and are slightly easier on the wrist for longer grooming sessions.
Thinning shears have serrated blades on one side and remove bulk from the coat without creating visible cut lines. These are invaluable for blending scissor work and reducing volume in thick coats. They’re not absolutely necessary for beginners but make a significant difference in final appearance.
Dematting tools like slicker brushes and metal combs are non-negotiable. You cannot successfully scissor-groom a matted dog. Period. Mats trap moisture, hold bacteria, and cause pain. If your dog is matted, use a slicker brush and metal comb first to remove mats gently (working from the outside of the mat inward, not yanking from the root). If you can’t remove mats with brushing—and mats larger than an inch are genuinely difficult for home grooming—you need professional dematting.
Grooming clippers (though the focus here is scissors, clippers are worth mentioning). If you find yourself doing more than touch-ups, especially on thicker-coated dogs, low-noise clippers with adjustable guards might be more practical than scissors.
Toenail clippers should be part of your grooming kit. Long nails are one of the most common issues leading to mobility problems in older dogs. Scissor-style or guillotine-style clippers work fine for most dogs; use ones specifically designed for pet nails.
High-velocity dryer or regular towel for drying and fluffing the coat before cutting. Working on damp hair is actually easier for some coats as it’s slightly more manageable.
Grooming table or stable elevated surface—essential for your back and your safety. A folding grooming table ($40-80) is affordable and makes the entire process easier and safer than bending over on the floor. If you don’t have a table, a sturdy bathtub edge or rubber-matted picnic table works in a pinch.
Non-slip mat for your dog to stand on essential for safety. A wet dog on a slippery surface risks sliding and pulling muscles.
Treats and patience possibly the most important tools of all.
How to Cut Dog Hair with Scissors: Step-by-Step Process
Preparation and Safety First
Before you even pick up scissors, your dog needs to be ready. A stressed, uncomfortable, or dirty dog makes this process miserable for both of you.
Start with a full bath and dry. Clean hair is easier to groom, cuts more cleanly, and helps you see the true texture and length of your dog’s coat. A dirty or smelly coat often contains debris that can dull your scissors and make cutting unpleasant. Dry thoroughlydamp hair can cause mats to tighten, and wet hair is harder to cut evenly because it clings.
Brush through completely. Use a slicker brush and metal comb to work through every section. Part the coat and check for any remaining mats or tangles, especially in areas like behind the ears, under the arms, around the rear, and on the feathering on the legs. You should be able to run your comb through the entire coat without catching. If you find mats, work them out before cutting. Never cut mats out with scissors—they can slip and nick the skin underneath.
Trim nails first. Long nails affect your dog’s posture and gait, making grooming more difficult. Clip them before you start scissor work so your dog stands more naturally and comfortably on the grooming table.
Get your dog comfortable on the grooming surface. Let them stand on the table for a few moments, reward with treats, and let them know this is a safe space. A nervous dog will move around, making cuts uneven and potentially dangerous. If your dog is extremely anxious about being on the table, do shorter sessions or consider whether professional grooming might be less stressful for them.
Have treats nearby. Reward calm behavior frequently. Some dogs do better with a long-lasting chew or lick mat while you work this keeps them occupied and reinforces that grooming is a positive experience.
The Actual Cutting: Working Section by Section
Now for the practical work. Most beginners find it easiest to start with the areas that matter least if you make a mistake usually the legs and chest before moving to the face, which is most visible.
Establish a cutting pattern. Work from one side to the other, back to front, or in whatever system feels natural to you. Consistency helps you maintain even length.
Cut against the growth direction of the hair (called “line cutting”). This means positioning your scissors at an angle that follows the natural growth pattern. You’ll make multiple passes rather than trying to cut everything in one pass—this is safer and creates a more natural look.
Keep your scissors parallel to the body contour. This takes practice, but it’s the difference between a choppy, uneven trim and one that looks intentional. Your scissors should follow the shape of the leg, chest, or body part you’re working on.
Never cut toward the skin. This is the golden rule for safety. Always angle your scissors so that if you slip, you’re cutting toward the end of the hair, not toward the skin. Scissor injuries to dog skin can be surprisingly serious, leading to infection or lasting discomfort.
Take smaller cuts than you think you need. You can always cut more hair later. You cannot put hair back. Start conservative and do multiple passes if needed.
Watch the hand positions. Keep your non-cutting hand (the hand holding the hair or holding the clippers if you’re using them) between the scissors and the skin. This creates a buffer if the scissors slip.
Trimming Specific Areas
Paw pads and feet are the easiest place to start practicing.
Long hair between paw pads is actually one of the most important areas to trim it collects moisture and debris, creating infection risk. Gently lift a paw, look between the toes, and carefully trim hair flush with (but not shorter than) the paw pad surface. Take very small snips. A common mistake is getting too aggressive and clipping the webbing between toes.
The feathering on the back of the legs and sides of the paws can be trimmed to follow the natural line of the leg. Step back frequently and look at the overall shape you want to create a neat but natural appearance.
Face and ears require the most care because of proximity to eyes, ears, and mouth.
For hair over the eyes, many owners prefer to create a neat part or tie back with a small band rather than cutting. If you do cut, use thinning shears rather than straight scissors this creates a softer look and is less likely to leave a blunt line that catches light unnaturally.
Hair in the ear canal itself should generally be left to professionals or handled with extreme caution. Many owners gently pluck ear hair (which doesn’t hurt if done correctly the hair releases from the follicle) rather than cutting it.
Trim around the muzzle carefully with very small scissors or thinning shears. Again, multiple tiny cuts beat one big cut.
Body and chest can be trimmed more boldly once you understand the pattern.
Follow the natural contours of the body. Most dogs look better with hair that gets slightly shorter toward the underside (chest, belly) rather than perfectly uniform length all around this creates a more flattering silhouette.
The tail can be trimmed into a rounded or tapered shape, depending on breed and preference. For feathered tails, trim the feathering on the underside shorter than the top to create a neat line.
Sanitary trim (rear end area) is important for hygiene.
Carefully trim hair around the rear end and between hind legs, following the same safety precautions. This is an area many owners prefer to let professionals handle, but it’s manageable with care if your dog holds still.
7 Common Mistakes That Even Experienced Owners Make
1: Cutting into mats instead of removing them first.
This leaves compressed hair and often nicks skin. Mat removal should always come before scissor work.
2: Trying to do too much in one session. Your dog gets tired, you get frustrated, and mistakes happen. Shorter, more frequent grooming sessions (15-30 minutes) are better than marathon sessions.
3: Using dull scissors and wondering why the cut looks bad.
Dull scissors yank on hair instead of cutting cleanly, creating frayed edges and an unpolished appearance. Sharpen scissors professionally every 6-12 months if you’re using them regularly, or replace cheap scissors that can’t hold an edge.
4: Cutting straight across without considering body contour.
A straight horizontal cut often looks choppy and unnatural. Following the natural shape of the body creates a much better result.
5: Ignoring stress signals.
If your dog is trembling, trying to escape, licking lips excessively, or yawning frequently, they’re stressed. Take a break. A stressed dog is more likely to move suddenly, making accidents more likely.
6: Cutting nails too short.
Cut just to the point where you see the tiniest hint of a black dot in the center of the nail that’s the start of the living tissue (the quick). Going too short causes bleeding and pain.
7: Applying inconsistent pressure or angle.
Rushing leads to uneven cuts. Slow down. Consistency matters more than speed.
Understanding Your Dog’s Specific Coat Type and What It Means for Scissor Grooming
Different coat types require different approaches, and this isn’t just about aesthetics it’s about coat health.
Single-coated dogs (like Labrador Retrievers or Boxers) have hair that grows from a single root per follicle. They shed continuously but don’t mat easily. Scissor grooming is generally straightforward and minimal touch-ups are usually needed.
Double-coated dogs (like German Shepherds, Golden Retrievers, and many northern breeds) have a dense undercoat beneath longer guard hairs. Here’s where many owners make mistakes: cutting into or through the undercoat with scissors is damaging. It can damage the follicles and actually change the coat texture permanently over time. For double-coated dogs, scissor grooming should focus on the guard hairs and feathering, not cutting into the dense undercoat. If your double-coated dog needs serious reduction in volume, clippers with an appropriate guard are actually better than scissors.
Curly or wavy coats (like Poodles and Doodles) are prone to matting if not maintained regularly. Scissor grooming these coats is absolutely possible but requires frequent maintenance ideally brushing 2-3 times per week and grooming every 6-8 weeks. Mats form quickly in these coats, often within days of grooming if not properly brushed.
Wiry or terrier coats were originally designed for hand-stripping, not scissor grooming. However, many modern owners scissor these coats instead. It’s easier than traditional hand-stripping but changes coat texture over time.
The practical takeaway: know your dog’s coat type before you start cutting. If you don’t know, ask your vet or a professional groomera quick conversation might save you from damaging your dog’s coat.
When Your Dog’s Coat Needs More Than Home Grooming
Knowing your limits is genuinely professional. Not every coat situation is a home grooming situation.
Severely matted coats require professional dematting. Mats that have become tight, cement-like tangles can’t be safely removed at home without risking skin damage. Professional groomers have high-velocity dryers and specialized dematting tools. Severe matting sometimes requires sedation for safe removal.
First-time breed-specific cuts should usually involve a professional. If your dog has never had a particular cut before like their first puppy cut or first professional trim—seeing a groomer once or twice teaches you what the cut should look like. Then you can maintain it at home.
Breeds with complicated grooming standards (show dogs, certain terriers, poodles) really do need professionals. Hand-stripping, precise scissor work following breed standards, and proper presentation take years to learn.
Dogs with skin conditions like hot spots, yeast infections, or allergic dermatitis need special care. Professional groomers trained to spot and work around these issues are invaluable. You don’t want to accidentally spread infection or cause discomfort.
Extremely anxious or aggressive dogs can get injured during home grooming simply because they’re moving around. Groomers have experience and tools (like grooming loops) to keep dogs safely still.
The honest truth: Professional grooming isn’t a luxury it’s a reasonable expense for keeping your dog healthy, comfortable, and confident. Using a groomer occasionally for serious work and maintaining between visits with at-home scissor work is actually the ideal approach for most owners.
Maintaining Your Dog’s Grooming Routine: Frequency and Between-Appointment Care
How often you need to groom depends entirely on your dog’s coat type, length, and your grooming style.
Long-haired dogs generally benefit from weekly brushing and grooming every 4-6 weeks (whether professional or at home).
Curly or wavy coats need the most frequent maintenance ideally brushed 2-3 times per week and groomed every 4-6 weeks. This prevents mats from becoming a problem.
Double-coated dogs need regular brushing (1-2 times per week) and occasional trimming, though many professionals recommend avoiding frequent scissor cuts and instead focusing on seasonal shedding management.
Short-haired dogs often need minimal grooming regular brushing and occasional baths are usually sufficient.
Between professional appointments or between your home grooming sessions:
- Brush regularly. This is the single most impactful thing you can do. A 10-minute brush session 2-3 times per week prevents mats and keeps your dog’s coat healthy.
- Spot-clean dirty areas. Use a washcloth and warm water to spot-clean muddy paws or soiled rear areas rather than giving full baths too frequently.
- Trim nails regularly. Every 2-4 weeks depending on growth rate and activity level.
- Check ears and paws. Look for redness, discharge, or odors that might indicate infection.
- Watch for behavior changes. If your dog suddenly seems uncomfortable or is excessively scratching or licking specific areas, it might indicate an issue brewing under the coat—check for mats, skin issues, or infections.
Safety Concerns and When to Stop and Call a Professional
Accidents can happen, even to careful owners. Know when to stop and when a situation is beyond your comfort level.
If you nick or cut the skin: Stop immediately. Clean the area gently with cool water and let it dry. Small nicks will usually stop bleeding within a few minutes. If bleeding doesn’t stop after 10 minutes, the cut is deep, or if you see discharge or swelling later, contact your vet.
If your dog is extremely stressed or trying to escape: Stop the session. Forcing grooming on an anxious dog increases the risk of accidents and teaches them to fear grooming. It’s better to stop, take a break, and try again later or switch to professional grooming.
If you’re not sure what you’re doing: It’s genuinely okay to say “I’m not confident about this.” Your dog’s comfort and safety matter more than saving money on a grooming appointment.
If mats are close to the skin or you can’t safely remove them: Don’t cut them out. This is how skin gets injured. Professional dematting is worth the cost.
If you notice unusual skin issues while grooming—red patches, sores, discharge, or unusual odors: These might indicate allergies, infections, or other health issues. Stop grooming and contact your vet before continuing.
The reality of pet ownership is knowing when professional help makes sense. It’s not a failure it’s responsible decision-making.
Special Considerations for Senior Dogs and Dogs with Health Issues
Grooming an older dog requires gentleness and awareness of potential pain or health issues.
Arthritis and joint pain make standing for long periods uncomfortable. Shorter grooming sessions (15-20 minutes) are better for senior dogs than marathon sessions. Provide cushioning on the grooming surface and let them rest between sections.
Cognitive decline or anxiety means some older dogs become more stressed by grooming. Work slowly and reward frequently. If grooming causes significant stress, professional grooming might actually be less stressful because groomers can often work quickly and efficiently.
Skin sensitivity increases with age. Use extra care around sensitive areas. Some older dogs develop thinner, more fragile skin that’s easily irritated.
Heart or respiratory issues mean standing time and stress should be minimized. Discuss with your vet before starting home grooming if your senior dog has cardiac or respiratory conditions.
Hearing or vision loss means you should be extra aware of your dog’s position and use different communication methods (touch, treats) to guide their behavior.
For senior dogs, grooming should be less about perfect appearance and more about comfort and health. Sometimes that means shorter sessions, less ambitious cuts, or a return to professional grooming.
Frequently Asked Questions
1: Can I use human hair scissors for dog grooming?
No. Human hair scissors are much smaller, duller (they’re not designed for the texture of dog coats), and often pinch rather than cut cleanly. This yanks on hair, causes discomfort, and leaves an unfinished look. Investing in actual grooming scissors ($25-50) saves frustration and your dog’s comfort.
2: How do I know if my scissors are sharp enough?
Try cutting a piece of paper. Sharp grooming scissors should glide through paper without sawing. If you’re sawing at the paper or having to apply pressure, your scissors are dull. Dull scissors pull on coat rather than cutting cleanly, creating a messy look and potentially causing discomfort. Have them professionally sharpened or replace them.
3: What’s the difference between grooming scissors and thinning shears?
Straight grooming scissors cut cleanly with two smooth blades, creating visible cut lines. They’re best for general trimming and creating shape. Thinning shears have one blade that’s serrated (saw-toothed) and one smooth blade. They remove bulk from the coat without creating visible cut lines—the result looks more blended and natural. Both are useful, though thinning shears take more practice to use well.
4: Can I safely cut my dog’s hair if they won’t hold still?
Not really. An unsteady dog increases the risk of accidental nicks and cuts. If your dog has serious difficulty standing still, it might be worth considering whether professional grooming (or even sedation for grooming, in some cases) is better than home grooming. A vet can discuss options if your dog has extreme anxiety around grooming.
5: How much hair should I cut off each time?
This depends on your goal. For maintenance, typically 1/4 to 1/2 inch per session is appropriate. For reshaping or removing bulk, you might take more, but start conservative—you can always cut more but you can’t put it back. Look at your dog’s current length and decide what length you want to achieve, then work gradually if you’re taking significant length.
6: Is it normal for my dog to be nervous during grooming?
Some nervousness is normal, especially for dogs who aren’t used to grooming. However, excessive stress (trembling, trying to escape, drooling, yawning frequently) suggests either that home grooming isn’t the right fit for this particular dog or that you need to go slower and build positive associations. Short, reward-heavy sessions help. If nervousness doesn’t improve, professional grooming or consulting a trainer about grooming anxiety might be worth considering.
More Information About Pets, Please Visit Our Website: How to Make a Dog Anxiety Wrap
How to Trim Dog Nails
Dog Brushes for Long Hair
Professional Dog Grooming Techniques
Cat Nail Care Products
Best Dog Grooming Kit for Beginners 2026
Building Confidence and Long-Term Success with DIY Dog Grooming
The truth about DIY dog grooming is that it gets easier. That first time might be stressful or uneven. That’s fine. By the fourth or fifth time, you’ll understand your dog’s coat, your tools will feel natural in your hands, and you’ll create grooming sessions that are calming for both of you.
Start with small, low-stakes trims. Paw pads and sanitary trims are good starting points because they’re less visible if you make mistakes.
Watch your dog’s behavior, not just your scissors work. A dog who’s relaxed and feels safe during grooming will cooperate better. This matters more than perfect lines.
Don’t compare your home grooming to professional grooming. Professional groomers have years of experience, specialized tools, and sometimes work on the same breed every day. Your goal is basic maintenance and health, not salon-quality cuts (unless that’s your hobby in which case, it’s a skill that develops over time).
Accept that maintenance grooming looks different from show grooming. That’s completely fine. A well-maintained dog who’s comfortable and healthy looks better than a perfectly coiffed dog who’s anxious about grooming.
Invest in a few quality tools and maintain them. A $40 pair of grooming scissors that you keep sharp and clean lasts years. Cheap scissors that dull quickly or don’t cut properly are frustrating and actually more expensive over time.
Practical Checklist: Before You Start Home Grooming
Use this simple checklist to make sure you’re ready to begin.
- You’ve identified your dog’s coat type (single, double, curly, wiry)
- You’ve researched whether your breed is generally suited for DIY scissor grooming
- You have professional-grade grooming scissors (not kitchen scissors)
- You have a slicker brush and metal comb to check for and remove mats
- You have a grooming table or elevated surface at a comfortable height
- You have non-slip matting for your dog to stand on
- Your dog has been bathed and completely dried
- You’ve brushed through the entire coat and confirmed there are no mats
- You’ve trimmed your dog’s nails
- You have treats nearby to reward calm behavior
- You’ve decided which area you’ll start with (paws or face are good beginner areas)
- You have realistic expectations your first attempt won’t look like a professional’s work, and that’s okay
Conclusion
Cutting your dog’s hair at home with scissors is genuinely achievable. It’s not complicated, dangerous, or exclusively for professional groomers. What it requires is patience, the right tools, and willingness to start small and build confidence over time.
The best home grooming happens when you understand your dog’s coat type, respect the limits of what you can safely do yourself, and know when to involve professionals. That’s not weakness it’s responsibility.
Most dogs benefit from regular grooming, and home scissor work fits beautifully into a grooming routine that includes professional appointments for complex work and home maintenance for general upkeep. You’re not replacing professional groomers; you’re becoming capable of basic pet care maintenance in a cost-effective, bond-building way.
Your dog doesn’t need salon-quality grooming every week. They need someone who cares about them to keep their coat healthy, check their skin and paws, trim their nails, and make grooming a calm, positive experience. That someone can be you.
Start small. Watch your dog. Learn their coat. Invest in decent tools. Build the skill gradually. And know when to call professionals. That’s honest, practical dog ownership and your dog will be healthier and happier for it.